

A door that won’t latch, creeps open on its own, or binds at the top corner usually isn’t a hinge problem — it’s the frame that’s moved. The frame either settled when the house did, or the fasteners holding it to the wall studs worked loose over time. Most guides jump straight to shimming, but they skip the diagnostic step that tells you whether the fix will actually hold or whether you’re looking at water damage or foundation movement that’ll worsen without separate attention.
I’ve fixed this in three rentals and twice in my own house, and the diagnostic makes the difference between a repair that holds steady and one that fails within a season.
Affiliate disclosure: This article contains recommendations for specific tools and materials. When you purchase through links to retailers, FixerDaily may earn a small commission at no additional cost to you. We only recommend products we’ve used or would use ourselves.
What you’ll need
Tools:
- 4-ft or 6-ft level
- Straightedge or long framing square
- Cordless drill (18V minimum)
- Pry bar or flat screwdriver
- Moisture meter (optional but worth it if the frame is exterior or near a bathroom)
Materials:
- Composite shims (Hy-Grade or Trim-Tex; 8-12 pack, roughly $8–$12)
- #8 × 2.5” deck screws or structural fasteners (not the original skinny screws; see Step 2)
- Paintable caulk
- Construction adhesive (optional; for permanent shim hold)
Prerequisites:
- Ability to remove a door from its hinges
- Stud finder with electrical detection if you’re working on an exterior frame
Before you start
Safety steps:
- Prop the door fully open or remove it before adjusting the frame — a swinging door can trap fingers during fastener work.
- Use a stud finder with wire detection before driving screws into the wall; pipes and electrical often run alongside door frames.
- If you find soft wood, discoloration, or moisture during inspection, stop and assess for water damage before fastening anything. Fasteners driven into rotted wood won’t hold, and you’ll compress damaged areas that need repair first.
Code notes: The International Residential Code (Section R611.7) specifies door frames must be plumb within ¼” over their height. In practice, aim for ±1/8” or less for smooth door operation. No permit is required for this repair — it’s maintenance, not structural alteration — unless the sagging reveals foundation movement that needs engineering review.
Step 1: Diagnose the cause
Place your level vertically along the hinge side of the frame. Check plumb at three points: 12” from the floor, at the middle hinge (usually around 36”), and near the top (around 60”).
- Deviation under 1/8” across the frame height → cosmetic misalignment; shimming will fix it.
- Deviation over ¼” → the frame has settled or the wall behind it moved. This may indicate foundation movement or structural settling. You can still shim it, but you’ll need to determine whether this is one-time settlement or active movement (see below).
- Soft spots, water stains, or musty smell → likely water damage. Stop here and address moisture first.
Distinguishing settled vs. active movement
If your frame shows significant deviation, you need to determine whether the house has finished settling or is still moving. According to Bob Vila’s foundation settling guide, this distinction determines whether a shim-and-fasten repair will hold long-term:
One-time settlement (safe to repair):
- The gap size stays consistent when you check it over one season (mark the jamb with pencil and measure monthly)
- No seasonal cycling — the door doesn’t bind in summer and gap in winter
- No progressive creaking or new cracks appearing near the frame
- Other doors and windows in the house are stable
Active movement (needs professional assessment):
- Gaps that reappear or widen after repair
- Seasonal cycling where the door binds tight in humid months and gaps in dry months
- New cracks in drywall around the frame or at corners
- Multiple doors and windows showing similar issues
If you’re seeing active movement, shimming will provide temporary relief but the underlying issue needs engineering review. Mark the date and gap size, then recheck in three months before committing to a permanent fix.
Check for moisture damage
If you have a moisture meter, test the wood around the hinge areas before proceeding. The Spruce recommends moisture testing for any door frame repair where water intrusion is possible:
- Below 12% moisture content → wood is dry; proceed with repair
- 12–15% moisture content → elevated but not saturated; identify the moisture source before fastening
- Above 15% moisture content → wood is saturated and requires remediation before any structural fastening
Use a pin-type meter for accuracy within ±2% when testing near fastener locations. If you don’t have a meter, inspect visually: soft wood, water stains, discoloration, or musty smell all indicate moisture levels that will compromise fastener hold.
Next, check if the door itself is the problem. Close the door halfway and let go. If it creeps open or closed on its own, the frame is out of level — the door is just following gravity. If the door stays put but won’t latch, the issue might be hinge-side wear rather than frame sag (different fix).
Run your hand along the hinge side of the frame where it meets the wall. You’re feeling for gaps between the door jamb and the framing stud behind it. Those gaps are where shims go.
I’ve caught moisture issues twice during this step — once from a roof leak I didn’t know about, once from a bathroom exhaust fan venting into the wall cavity. Both times, shimming the frame without fixing the moisture source would’ve been a waste of screws.
Step 2: Upgrade the fasteners at each hinge

Most sagging happens because the screws holding the hinges to the frame worked loose. The original fasteners are usually #6 or smaller wood screws, and they don’t grip well once the wood fibers around them compress from years of door weight and swinging force.
Remove the door by propping it open at 90°, placing a shim or block under the bottom edge, and unscrewing the hinges from the frame side (not the door side — leave those alone). Inspect the screw holes in the jamb:
- Clean holes with firm edges → back out the old screws and replace them with #8 × 2.5” deck screws or structural fasteners. The larger diameter and deeper bite give you a fresh grip in the stud behind the jamb, as Family Handyman’s door repair guide recommends for permanent fixes.
- Stripped or crumbled holes → you’ll need to shim behind the hinge before driving new fasteners (next step covers this).
Don’t reuse the original screws. The cost difference is minimal, and the difference in holding power is substantial.
Step 3: Shim behind the hinges
If your straightedge test in Step 1 showed a gap between the jamb and the wall stud, you need shims to close that gap before the fasteners can pull the frame tight.
Composite vs. wood shims: durability comparison
Most hardware stores stock both cedar and composite shims at similar prices, but their long-term performance differs significantly:
Composite shims (fiberglass-reinforced plastic):
- Zero compression over time — they maintain thickness indefinitely
- Complete rot and moisture resistance
- Cost roughly 30% more than cedar (typically $8–$12 vs. $6–$9 for comparable packs)
- Readily available at big-box stores
- Best for: exterior frames, bathroom/kitchen doors, any location with moisture risk
Cedar shims (tapered wood):
- Compress gradually under sustained load, especially in humid conditions
- Will rot if moisture penetrates the jamb
- Slightly less expensive
- Easier to trim and shape on-site
- Best for: dry interior applications (bedroom closets, interior hall doors)
For door frames, I use composite shims exclusively. The cost difference is small enough that the durability advantage matters more, and I’ve pulled out compressed or rotted cedar shims from previous repairs often enough to know they’re not worth the savings.
Installing the shims
Open the door to 90° and wedge it there with a doorstop or block. Starting with the top hinge:
- Identify the gap size between the back of the jamb and the framing stud. Composite shims come in graduated thickness; pick one that fills the gap without forcing.
- Slide the shim behind the hinge mounting area until it’s snug. You should feel light resistance, not crushing force.
- Hold the shim in place and drive a #8 × 2.5” screw through the hinge hole, through the jamb, through the shim, and into the stud. The screw should pull the jamb tight against the shim, which is now tight against the stud.
- Repeat for the middle and bottom hinges.
If the gap is very narrow (under 1/8”), you can skip the shim and just use the longer screw to pull the jamb to the stud. The screw will close small gaps on its own.
Step 4: Reinstall the door and verify plumb
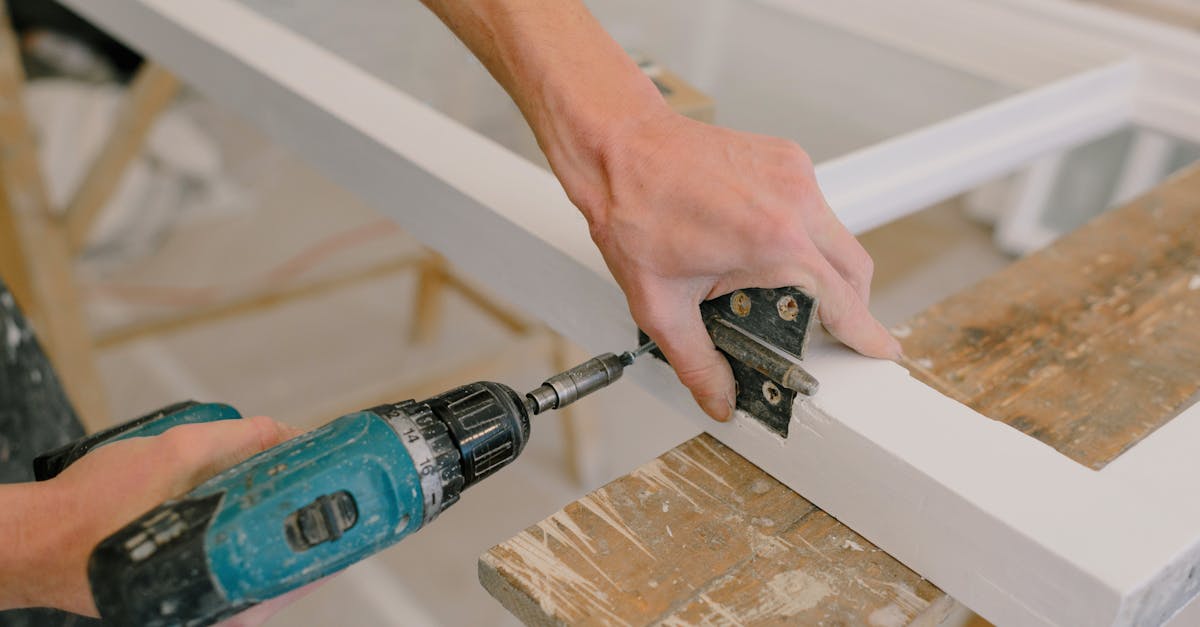
Rehang the door by aligning the hinge leaves and driving the screws back into the door-side hinge plates (the ones you didn’t touch). Close the door and test:
- Does it latch without force?
- Does it stay put when you open it halfway?
- Run the level along the hinge side again — you should now see deviation under 1/8”.
If the door still creeps or binds, check the latch-side gap. Sometimes fixing the hinge side reveals that the latch-side jamb is also slightly out of square. That’s a separate adjustment involving the strike plate, not the frame itself.
Once the door operates correctly, seal any visible shim gaps and screw holes with paintable caulk. This blocks moisture entry and cleans up the finish.
Troubleshooting
Problem: Door still sags after shimming
The frame is likely still settling, or the screws aren’t reaching the stud. Pull one screw and check its length — if it’s under 2.5”, it may be biting into drywall or insulation rather than solid wood. Replace with longer structural screws. If the frame is still moving, you’re looking at foundation settlement; see “When to call a professional” below.
Problem: Screws strip out or won’t tighten
The wood behind the jamb is damaged or rotten. Remove the screw, inspect the hole for soft or discolored wood, and address moisture issues before proceeding. You can’t fasten into damaged wood and expect it to hold.
Problem: Door latches now, but there’s a noticeable gap at the top or bottom
You’ve fixed the hinge-side sag, but the frame itself may be twisted (one jamb is plumb, the other isn’t). Fixing twisted frames is more involved — usually requires adjusting both jambs and possibly the header. That’s a good time to call a finish carpenter.
When to call a professional
Call a pro if:
- Frame deviation exceeds ¼” or you see other doors and windows in the house misaligned. This suggests foundation movement, not just loose fasteners. A structural engineer should assess before you fasten anything.
- Wood is soft, wet, or discolored behind the jamb, especially if moisture content tests above 15%. Fastening into rot won’t hold, and moisture damage spreads.
- The door frame is exterior and you suspect water intrusion — especially if the frame sits below exterior grade or near a roof or gutter issue. Moisture trapped in the jamb will worsen under fastener pressure.
- You observe active movement (seasonal cycling, progressive gaps, new cracks) rather than one-time settlement. The underlying cause needs professional diagnosis.
- You’re uncertain about pipes or wiring behind the wall. A cordless drill can punch through copper or romex before you feel it. If you can’t confirm the path is clear, a pro can use thermal imaging or test drilling to verify.
FAQ
How do I know if the problem is the door or the frame?
Check the frame for plumb first using a level on the hinge-side jamb. If the frame is out of level and the door creeps open or closed on its own, the frame is the problem. If the frame is plumb but the door won’t latch or binds, the issue is likely the hinges or the door itself — not the frame.
Can I fix a sagging door frame without removing the door?
You can shim and fasten with the door on, but it’s harder to access the screws and much easier to trap your fingers. Removing the door takes a few minutes and makes the whole job safer and cleaner.
How long does this repair last?
If the fastener upgrade and shimming are done correctly with composite shims and the house isn’t still settling, this repair should hold for many years in my experience. If the frame starts sagging again within a season or two, it’s a sign of ongoing foundation movement or moisture damage that needs separate attention.
Should I use composite or cedar shims for an interior bedroom door?
Cedar works fine for dry interior locations like bedroom closets. But composite shims cost roughly 30% more and eliminate any risk of compression or moisture damage over time, so I use them for all door frames regardless of location. The durability trade-off is worth the small cost difference.
The fastener upgrade is the part most guides skip, and it’s the part that matters. Shimming a frame with the same screws that already failed just buys you limited time before the wood fibers compress again. Using structural screws and durable composite shims gives you a repair that actually holds.