
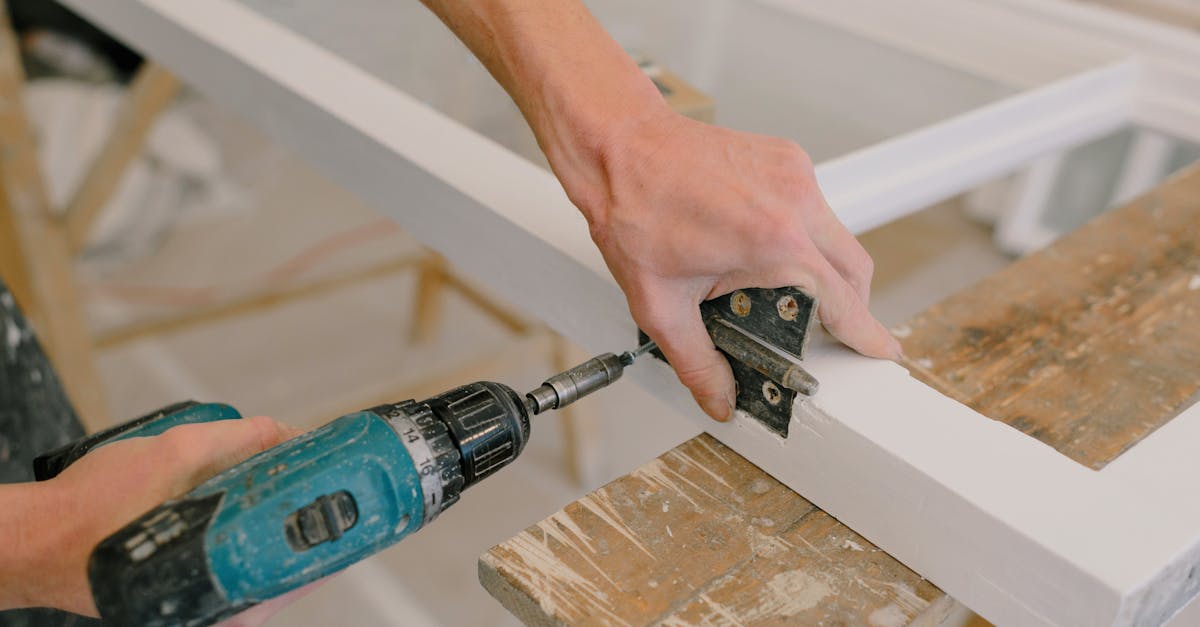
A crooked cabinet door or one that won’t stay closed usually means worn hinges, and every time you open it, it telegraphs “this kitchen isn’t maintained” to anyone paying attention. The fix costs $15–40 in parts and takes about 30 minutes per door — compare that to $400+ for cabinet refacing or living with doors that sag for another year.
The real hold-up for most people isn’t the installation. It’s standing in the hardware aisle staring at twelve different hinge types and not knowing which one matches what’s already on the door. This guide walks you through identifying what you have, choosing the right replacement, and installing it without stripping the mounting holes.
Affiliate disclosure: This article includes links to products I’ve used and recommend. If you buy through them, I earn a small commission at no extra cost to you.
Try adjustment before replacement
Before you buy new hinges, spend five minutes testing whether adjustment solves your problem. Most modern cabinet hinges have three-way adjustment capability: side-to-side, height, and depth. If your door sags but the hinge itself isn’t cracked, broken, or visibly worn, adjustment can often fix it without spending a dollar.
Open the door and look at the hinge where it attaches to the cabinet frame. You should see two or three small adjustment screws — usually Phillips head, sometimes hex. Turn the depth screw (the one that controls how far the door sits from the frame) a quarter-turn and close the door. If the gap improves, keep adjusting until the door sits flush. Test the vertical and horizontal screws the same way.
Replace the hinge only if:
- The hinge arm is cracked, bent, or broken
- Screw holes are stripped and won’t hold screws even after repair (see toothpick fix below)
- The hinge cup is loose in the door bore and rocks when you wiggle it
- The mounting surface on the cabinet frame is warped or cracked
I’ve fixed at least a dozen sagging doors with adjustment alone. You avoid the $15+ hinge cost, you don’t risk drilling or stripping anything, and it takes less time than driving to the hardware store. If adjustment stops the sag, you’re done — the hinge was fine.
What you’ll need
Tools:
- Phillips #2 screwdriver (most common; check your existing hinge screws first)
- Flathead screwdriver (for stubborn or stripped screws)
- 35mm Forstner bit and drill (only if drilling new bores for concealed hinges)
- Masking tape and pencil
- Small container or magnetic tray for screws
- Drop cloth or cardboard
Materials:
- Replacement hinges (see identification section below before buying)
- Wood toothpicks (for stripped holes, if needed)
Optional but helpful:
- Magnetic-tip screwdriver (prevents dropped screws inside the cabinet)
- Helper to support the door while you work
Identify your hinge type before you buy
Open the cabinet door and look at where the hinge attaches. The most common cabinet door hinge types are:
| Hinge Type | Where It’s Visible | Bore Size | Typical Cost per Pair | Best For |
|---|---|---|---|---|
| Standard cup hinge | Hidden when door closes; visible from inside cabinet | 35mm | $3–8 | Basic replacement, budget-friendly |
| Self-closing cup hinge | Same as standard, with small spring visible | 35mm | $8–15 | Kitchens with kids; reduces slam |
| Concealed (Euro) hinge | Fully hidden when closed | 35mm (precise) | $8–18 | Modern look; requires exact drilling |
| Butt hinge | Visible on door edge when closed | N/A | $4–10 | Older cabinets; not recommended for new installs |
If you see a recessed cup (a circular depression) in the door edge, you have a cup hinge — standard in most cabinets built after 1990. The industry standard bore diameter is 35mm at 12–13mm depth. This precision matters: a 34mm bore won’t let the cup seat fully and causes rocking; a 36mm bore strips immediately when you tighten the screws. If you’re drilling new bores, use a 35mm Forstner bit — not a spade bit, not eyeballed — and set your drill’s depth stop to 12mm. Cabinet hardware manufacturers like Blum specify this depth in their installation standards because it’s the difference between a solid install and a stripped-hole callback.
Pull out your phone, take a clear photo of the hinge from both the door side and the cabinet frame side, and bring it to the store. If the clerk can match it visually, you’re set.
For butt hinges (the flat, L-shaped hinges visible on the door edge), measure the height and width. These vary more than cup hinges, and you’ll want an exact match or you’ll be drilling new screw holes.
Before you start
Support the door. A cabinet door weighs 8–15 pounds depending on size and material. When you remove the last hinge, that weight drops. Have a helper hold the door from below, or use a small jack or a stack of books wedged under the door corner. I’ve dropped exactly one door in my life — onto my foot — and that was enough.
Test your screwdriver fit. Most cabinet hinges use Phillips #2 screws, but some older ones use #1 or flathead. Test-fit your screwdriver in one screw before committing. A loose fit strips screw heads, and stripped heads mean you’re drilling out screws instead of unscrewing them.
Clear the cabinet below. If a screw falls (and one will), you don’t want it landing in a bowl of flour or knocking over a bottle of olive oil.
Step 1: Mark hinge locations
With masking tape, mark the position of each hinge on both the door and the cabinet frame. You’re not moving the hinges, but if you’re replacing multiple doors or taking a break mid-project, these marks prevent confusion later. Write “top” and “bottom” on the tape if the door has two hinges.
Step 2: Remove cabinet-side screws first
Starting with the bottom hinge, remove the two screws connecting the hinge arm to the cabinet frame. Keep these screws — you’ll reuse them. Do not touch the screws on the door side yet.
Work bottom-to-top. The top hinge carries most of the door’s weight, so removing it last prevents sudden drops. Once all cabinet-side screws are out, the door will be loose but still attached by the door-side screws.
Step 3: Remove door-side screws

With the door supported, remove the screws holding each hinge to the door. The hinge cup should pull out of the door edge with a gentle wiggle. If it’s stuck, don’t pry aggressively — you’ll chip the door edge. Wiggle side-to-side instead of straight out.
Step 4: Inspect the mounting holes
Look at the screw holes in both the door and the cabinet frame. You’re checking for two problems:
- Stripped holes — the screw hole is enlarged or the wood is soft. If you can push a toothpick into the hole without resistance, it’s stripped.
- Cracks — the wood around the hole is split or cracked.
For stripped holes, break a wooden toothpick in half, dip it in wood glue, and press it into the hole. Let it dry for 10 minutes, then trim it flush with a utility knife. This gives the new screw something to bite into. For cracks or soft wood, see “When to call a professional” below.
Step 5: Install the new hinge on the door
Align the hinge cup with the existing bore in the door edge. The cup should press-fit snugly. Insert the top screw first and tighten it only halfway — this lets you adjust if the hinge sits crooked. Insert the bottom screw, snug it, then check that the hinge sits flush against the door edge. Once aligned, tighten both screws firmly but not aggressively. Over-tightening sinks the screw into the wood and weakens the hold.
Repeat for all hinges before rehanging the door.
Step 6: Hang the door
Position the hinge arms against the mounting plates on the cabinet frame (or the screw holes, if you’re replacing butt hinges). Insert the screws you removed in Step 2 and tighten them snug. Close the door slowly and check alignment.
Step 7: Adjust if the door gaps or sags

Most modern cup hinges have three adjustment screws — one for vertical position, one for horizontal (side-to-side), and one for depth (how far the door sits from the frame). These micro-adjusters let you fine-tune the door position without removing screws or drilling new holes.
If the door gaps at the top or bottom: Adjust the vertical screw (usually the one closest to the hinge arm). Turn it 1/4 turn, close the door, and check. Repeat until the gap closes.
If the door sits crooked (one side closer to the frame than the other): Adjust the horizontal screw. A quarter-turn usually moves the door 1–2mm.
If the door won’t close flush or sticks out: Adjust the depth screw (usually a cam or eccentric screw on the hinge mounting plate).
Most alignment issues resolve with these adjustments. If the door still sags after adjusting, the cabinet frame itself might be out of square — that’s a structural issue, not a hinge issue.
Should you upgrade to self-closing cabinet hinges?
Self-closing cabinet hinges have a small spring that pulls the door shut over the last 2–3 seconds of travel. They cost $5–7 more per pair than standard hinges, but there’s a compatibility problem most people don’t know about until they’ve already bought them: existing mounting holes rarely align with soft-close cup positions. The hinge cup itself is the same 35mm bore, but the mounting plate on the cabinet frame often sits 2–3mm off from where a standard hinge mounts. That means new screw holes, and on particleboard or MDF cabinet frames, new holes close to old holes often strip immediately.
Cost runs $50–100 per pair for quality soft-close hinges (cheap ones fail within a year), and that often exceeds the value for existing cabinets — especially if you’re only replacing one or two doors. Weight limits also exclude heavy slab doors or glass-front cabinets; the spring mechanism wears out faster under heavy load.
Soft-close makes sense if:
- You’re installing new cabinet doors and can drill the mounting holes in the right positions from the start
- You have lightweight inset doors (not heavy slabs)
- You have kids who slam cabinet doors and the noise is disruptive
- Your kitchen opens into a living space and cabinet noise matters
Standard hinges plus adjustment solve the real problem 80% of the time. I’ve installed self-closing hinges in my kitchen on lightweight doors where the mounting holes happened to align, and standard self-closing hinges in the garage. The kitchen upgrade was worth it for the noise reduction. For the garage and the one heavy door in the pantry, standard hinges with proper adjustment were the right call.
What about concealed hinge installation?
Concealed hinges (also called Euro hinges or full-overlay hinges) hide completely when the door is closed, giving a clean, modern look. The catch: concealed hinge installation requires a precise 35mm bore drilled into the door edge at exactly 12–13mm depth. If your door already has this bore from the factory, you can swap in concealed hinges in 10 minutes. If it doesn’t, you’ll need a hinge jig (about $20) and a 35mm Forstner bit to drill the bore accurately.
Hand-drilling a hinge bore without a jig risks a crooked hole — one that’s visible when the door closes and causes the hinge to sit at an angle. For a single sagging door, the time and tool investment isn’t worth it. A better option: replace with quality standard cup hinges or self-closing hinges. You get the same hidden look (hinges aren’t visible when the door is closed) without the drilling risk or added cost.
If you’re refreshing an entire kitchen and want the concealed look, a hinge jig plus concealed hinges runs about $60–80 total for a two-hinge door. Budget 1–2 hours per door for drilling and installation. That’s a reasonable weekend project. For one door, stick with cup hinges.
Troubleshooting
Problem: New hinge screws won’t tighten — they spin freely
The screw holes are stripped. Remove the hinge, use the toothpick-and-glue fix from Step 4, and let it dry completely (30 minutes minimum). If multiple holes are stripped, consider slightly longer screws (add 1/4 inch to the original length), but don’t go so long that they punch through the cabinet face or door.
Problem: Door closes too slowly or won’t latch (self-closing hinges)
The spring tension is adjustable on most self-closing hinges. Look for a small set screw on the hinge arm — turning it clockwise increases closing speed. If there’s no adjustment screw, the spring may be worn out. Self-closing springs last 5–10 years under normal use; replacement is your only option.
Problem: Hinge cup is loose in the door bore
The bore is too large (either worn or mismatched). You can shim it: cut a thin strip of wood veneer or thick cardboard, wrap it around the hinge cup, and press the cup back into the bore. This is a temporary fix. For a permanent repair, fill the bore with wood filler, let it cure, and re-drill the bore with a 35mm Forstner bit. Fine Woodworking’s cabinet hardware guides cover this repair in detail — it requires a drill press or jig for accuracy.
When to call a professional
Call a carpenter if:
- The door edge is cracked, split, or the wood is soft and spongy (water damage or rot). Hinges won’t hold in compromised wood, and the door is a safety risk.
- The cabinet frame is visibly warped or out of square. Hinges can’t correct structural problems — the cabinet itself needs repair or replacement.
- You’re replacing hinges on 10+ doors. Time investment tips past DIY-for-fun into DIY-for-tedium. A carpenter will complete the job in half the time and guarantee fit.
For a single door with intact wood and a standard cup hinge, this is a straightforward 30-minute repair. I’ve done it in rentals (with landlord permission) and in my own 1970s house more times than I’ve kept track of.
FAQ
Can I replace just one hinge, or do I need to replace both?
You can replace just one, but if one hinge failed from wear, the other is likely close behind. Replacing both at the same time saves you a second trip to the hardware store in six months. Hinges are cheap enough ($3–8 per pair) that replacing both is the smarter move.
How do I know if the cabinet frame is too damaged for new hinges?
Press your thumb into the wood around the screw holes on the cabinet frame. If the wood flexes or feels soft, it’s compromised. Surface cracks (thin lines in the finish) are cosmetic and fine. Deep cracks that run through the wood or expose raw, splintered layers mean the frame won’t hold screws reliably — call a pro.
Do I need to remove the cabinet doors to paint or refinish the cabinets?
Yes, and replacing the hinges at the same time is smart. If you’re already removing the doors for painting, spend the extra $10–15 per door to install fresh hinges. Old hinges that get painted and reinstalled often bind or don’t adjust smoothly.
What’s the difference between overlay, inset, and partial overlay hinges?
These terms describe how the door sits relative to the cabinet frame. Full overlay means the door covers the entire frame front. Partial overlay means the door covers part of the frame (common in older cabinets with face frames). Inset means the door sits flush inside the frame. When buying replacement hinges, match the overlay type to your existing setup — mixing types results in doors that don’t align with each other. The National Kitchen & Bath Association’s installation standards specify these configurations based on cabinet construction type.
Test the door a few times after installation. Open it, close it, check that it latches (if you have a latch), and make sure it doesn’t sag or gap. If it feels solid, you’re done. If it needs minor tweaking, spend five minutes with the adjustment screws before calling it finished. A properly installed hinge should last 10–15 years under normal use — longer if you went with self-closing and avoided the slam-wear cycle.