
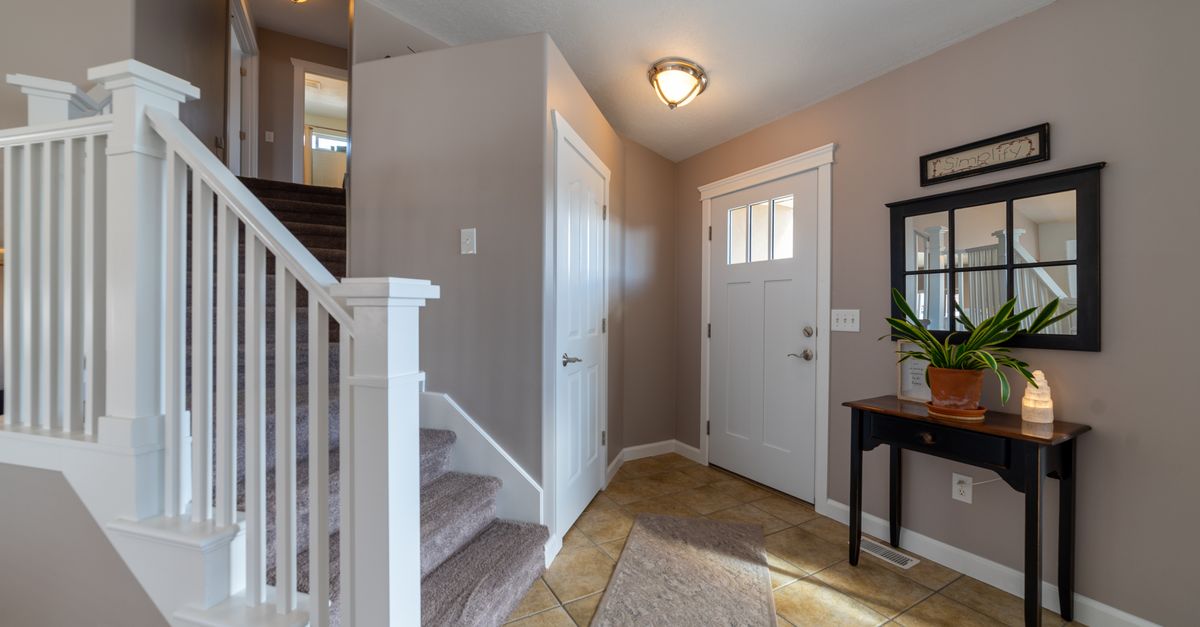
The gap between a door frame and drywall tells you everything about how a room was finished. If it’s covered with clean, tight-mitered trim that sits flat and reveals a consistent border, someone took their time. If it’s raw or gapped or wavy, someone ran out of patience or never started. Door casing is the difference, and it’s one of the few finish jobs where amateur work can look professional if you measure twice and test-fit before you nail.
This is cosmetic work — you’re fastening decorative boards to an already-installed frame. The worst outcome is a visible gap at the joint or a nail hole you fill twice. The best case is a doorway that looks factory-installed, and you saved $300 in labor.
Choosing the right trim profile
Before you buy boards, decide which profile you’re installing. The article assumes you’re matching existing trim, but if you’re starting fresh or renovating a whole room, here’s what matters:
Colonial/traditional casing (often called “colonial crown” or “traditional cap”): a flat board with a decorative routed edge — gentle curves, sometimes a small bead or step detail. This is the safe default for most homes built after 1950. Costs $1.50–3 per linear foot in paint-grade pine, installs easily with standard miter joints, and reads as “finished but not fussy.” Good visual match for ranch, colonial, and craftsman-style homes.
Ranch cap or flat-stock casing: completely flat face, square or slightly rounded edges. The minimalist option. Costs $0.80–1.50 per linear foot, dead simple to install (miters are more forgiving because there’s no profile to align), and works in modern or mid-century interiors where you want trim to disappear. Can look cheap in traditional homes unless you use hardwood and a wide board (3.5”–5”).
Clamshell casing: rounded face that curves out from the wall, named because it looks like a clamshell in cross-section. Common in builder-grade 1980s–2000s homes. Costs $1–2 per linear foot, installs with standard miters, visually softens corners. If your house already has clamshell, match it — mixing profiles in adjacent rooms looks unfinished.
Picture-frame or backband casing: flat casing with a separate decorative cap piece applied on top. This is advanced trim work (you’re installing two layers) and costs $3–6 per linear foot in materials. Looks formal and high-end. Not recommended for a first trim project — the cap piece has to align perfectly with the base casing or it reads as a mistake.
Matching existing trim: If you’re adding trim to one door in a house that already has trim elsewhere, bring a sample piece (or a photo with a ruler for scale) to the lumber yard. Most yards stock 6–10 common profiles. If yours is discontinued, you can get custom-milled matching trim, but expect $8–15 per linear foot and a minimum order. For a single door, it’s often cheaper to replace all the trim in that room with a new matching profile than to custom-mill one doorway’s worth of vintage casing.
Visual proportions: Narrow trim (2–2.5” wide) works in small rooms and low-ceiling spaces — it doesn’t steal visual space. Wide trim (3.5–5”) looks substantial in large rooms with 9’+ ceilings but can overwhelm a small bedroom. The reveal you choose (1/4”–3/8”) should scale with the trim width — narrow trim looks better with a smaller reveal.
What you’ll need
Tools:
- Miter saw (10” compound recommended) or hand miter box with handsaw
- Tape measure and pencil
- Combination square or speed square
- Brad nail gun (16- or 18-gauge) with compressor, or cordless model
- Alternative: 16 oz finish hammer and nail set
- Level (2-foot or longer)
- Stud finder (optional but helpful for finding jack studs)
- Coping saw (only if you’re doing coped inside corners instead of miter joints)
- Wood shims (cedar shims, sold in bundles of 12–20 for $3–5)
Materials:
- Interior door casing stock in your chosen profile: enough for two 7-foot sides and one 3-foot head piece — about 17 linear feet total for a standard door (buy 20 linear feet to allow for cutting waste)
- Finish nails: 1.25”–2” length, 16- or 18-gauge (one small box)
- Wood filler: Elmer’s Carpenter’s Wood Filler for painted trim, or Minwax stainable filler for stained trim
- Paintable caulk (DAP Alex Plus or similar latex caulk for painter’s-finish aesthetic)
- Sandpaper: 120-grit and 150-grit
- Primer and paint, or stain and polyurethane (depending on your finish choice)
Prerequisites:
- Door frame already installed and square (diagonals within 1/4”)
- Wall surface finished (drywall mudded and sanded, or plaster complete)
Before you start
Eye and ear protection required. Miter saws throw fine dust and small chips; brad nailers can ricochet fasteners off hard knots. OSHA power tool safety standards require eye protection for both operations in professional settings — the same hazards apply in your house. Hearing protection is recommended for pneumatic nail guns in enclosed rooms.
Check your reveal. The “reveal” is the offset between the inside edge of the door frame and the inside edge of the trim. Standard reveal is 1/4” to 3/8”. Mark this distance on the frame with a pencil at the top corners and midway down each side so you have a guide when you position the trim.
Acclimate the trim. Let your trim boards sit in the room for 48 hours before cutting. Wood expands and contracts with humidity changes. Trim that’s too dry will gap in winter; trim that’s too wet will buckle in summer. If you’re working in a climate-controlled house, this is less critical, but it’s a good habit — University of Wisconsin Extension building science guidance notes that dimensional lumber can move up to 1/8” across its width with seasonal moisture changes.
Know when to stop — but also when to fix instead of quit. If your door frame is severely out of square (diagonal measurements differ by more than 1/2”), don’t assume you need to abandon the project. See the “Dealing with out-of-square frames” section below for specific shimming and gap-filling strategies that can save the job.
Miter vs. coped joints: which technique to use
The article assumes you’re using mitered corners (two 45° cuts that meet at a point). That’s the standard residential technique and what you should use for door trim in most cases. But if you’ve heard of “coping” and wondered when to use it, here’s the decision framework:
Miter joints (two 45° cuts meeting): Fast, simple, requires only a miter saw. Visual result is a clean corner if the cuts are accurate. Failure mode: seasonal wood movement causes gaps to open at the joint, especially in homes with wide humidity swings (no climate control, or in humid-summer/dry-winter climates). You’ll see a hairline gap appear in January and close in July, or vice versa. This is annoying but cosmetic — caulk fills it, and paint hides the caulk line. For door trim, miters are the right choice unless you’re working in a period-restoration context where coping is historically appropriate.
Coped joints (one piece cut to follow the profile of the other): Durable — the joint doesn’t gap with seasonal movement because one piece overlaps the other. The skill requirement is significantly higher: you’re cutting a curved line freehand with a coping saw, following the profile reveal on a 45° miter cut. It takes practice to get a tight fit. Coped joints are standard for inside corners on baseboard and crown molding (where they handle foot traffic and visual scrutiny better than miters), but they’re rare on door casing because door trim has simple 90° corners and doesn’t experience the same movement stress as long baseboard runs.
When to cope instead of miter:
- You’re matching existing coped trim in a historic home and want visual consistency
- You’re installing hardwood trim in a room with known humidity swings and you want zero visible gaps long-term
- You already know how to cope and prefer the durability
When to stick with miters:
- This is your first or second trim project (miters are more forgiving)
- You’re working with paint-grade trim (small gaps disappear under caulk and paint)
- The room is climate-controlled year-round (minimal seasonal movement)
- You’re on a weekend timeline (coping takes 3–4× longer per joint)
For this walkthrough, I’m assuming mitered corners. If you’re coping, the measurement and fastening steps are identical — only the cutting technique changes.
Step 1: Measure and mark your reveal
Use a combination square set to 1/4” (or your chosen reveal distance) and mark the door frame at several points: both top corners, midway down each side, and the bottom corners if you’re running trim all the way to the floor.
These marks are your alignment guides. When you position the trim, the inside edge should line up with these marks, creating a consistent border around the entire doorway. If the marks don’t line up because the frame isn’t perfectly straight, split the difference — adjust the trim so the reveal averages out visually.
Step 2: Cut the head casing
Measure the width of the door opening at the wall surface, not the frame itself. Add twice your reveal distance to get the inside-edge-to-inside-edge measurement for the head casing.
For miter joints, cut both ends of the head casing at 45° angles pointing inward. Mark the cut line on the back face of the trim so any tear-out from the saw blade happens on the non-visible side.
Set your miter saw to exactly 45°. Most saws have a preset stop at this angle — use it. Make the cut in one smooth motion without forcing the blade. Let the saw come to full speed before cutting, and let it stop completely before lifting the piece.
Step 3: Test-fit the head casing

Hold the head casing against the frame with the inside edge aligned to your reveal marks. The two 45° cuts should point down toward where the side casings will meet them.
Check that the casing sits flat against the wall. If the wall is proud (sticks out past the frame), you’ll see a gap between the casing and the frame. You can fix this with a thin shim behind the casing, or by planing the back edge of the casing slightly. If the frame is proud of the wall, the casing will rock. In that case, you may need to shim the wall or accept a small gap that you’ll fill with caulk later.
Don’t fasten yet — just verify the fit.
Step 4: Cut and fit the side casings
Measure from the floor (or from the top of your baseboard if it’s already installed) to the point where the side casing will meet the bottom of the head casing’s miter cut. This is your long-point measurement for the side casing.
Cut the top of each side casing at 45°, angled to meet the head casing. The bottom cut is usually square (90°) if the casing runs to the floor. If you have baseboard already in place, you’ll cut the side casing to sit on top of the baseboard, also at 90°.
Test-fit both side casings. Press the miters together gently. You’re looking for a tight joint with no daylight showing through. If you see a gap, check that your saw is cutting true 45° angles — even 1° off will create a visible gap. You can sand the miter face lightly with 120-grit to adjust the fit, but it’s slow going.
Step 5: Fasten the head casing
Once you’re satisfied with the fit, fasten the head casing first. Position it carefully against your reveal marks.
If you’re using a brad nailer, set the air pressure to 80–100 PSI for 18-gauge brads in softwood trim like pine. Drive nails through the trim into the door frame (the structural part, not just the drywall) every 8–12 inches. Angle the nails slightly inward (about 10–15°) to create a mechanical lock.
If you’re hand-nailing, pre-drill 1/16” pilot holes to prevent splitting, especially near the ends of the board. Drive 1.5” finish nails with a hammer, then use a nail set to sink the heads about 1/16” below the surface.
Add a second row of nails along the outer edge of the casing, angling them to catch the wall framing (the jack stud, if you can find it with a stud finder). This pulls the casing tight to the wall and prevents it from cupping over time.
Step 6: Fasten the side casings

Fit each side casing against the head casing, aligning the miters carefully. Hold the joint tight with one hand (or have someone help) while you drive the first nail near the top of the side casing, about 2 inches down from the miter joint. This locks the miter in place.
Continue fastening down the length of the side casing, spacing nails every 8–12 inches and alternating between the inner edge (into the door frame) and the outer edge (into the wall framing).
Check the miter joint after fastening. If it opened up slightly when you nailed, you can drive one small brad nail diagonally through the miter itself, angling from the head casing down into the side casing. This pulls the joint back together. Sink the nail head and fill the hole later.
Dealing with out-of-square frames: shimming and gap strategies
The existing article told you to stop if the frame was more than 1/2” out of square. That’s conservative advice — in reality, you have several remedies before you give up or call a carpenter.
Diagnosing the problem: Measure both diagonals of the door frame (top left corner to bottom right, and top right to bottom left). If they differ by 1/4”–1/2”, the frame is slightly out of square. You’ll see this show up as uneven gaps when you test-fit the trim — one miter joint might be tight while the opposite side has daylight showing through.
Shimming the trim (for frames that are proud or recessed unevenly):
If the door frame sticks out past the drywall in some spots but not others, or if the wall is bowed, the trim won’t sit flat. Here’s how to fix it:
-
Identify high and low spots by holding a straightedge (or the trim itself) across the frame while watching for gaps between the trim and the wall.
-
Place shims behind the trim at the low spots. Use cedar shims (tapered wood shingles) broken or cut to the thickness you need. For gaps under 1/8”, one shim is usually enough. For 1/8”–1/4” gaps, stack two shims thin-end-to-thin-end to create a flat pad.
-
Fasten through the shims. Drive your nails through the trim, through the shim, and into the wall framing. The shim becomes permanent backing. Trim the shim flush with a utility knife after fastening — score it along the trim edge and snap it off.
-
Fill any remaining gaps with caulk before painting. A 1/8” gap filled with white caulk and painted over disappears visually. Anything larger than 3/16” starts to look like a deliberate design element (not in a good way).
Adjusting miter angles for out-of-square corners:
If your frame is out of square, a standard 45° miter won’t close tightly on all four corners. This Old House trim techniques recommend this fix:
-
Measure the actual angle of the corner using an adjustable bevel gauge or a digital angle finder. If the frame is out of square, the corner won’t be exactly 90° — it might be 88° or 92°.
-
Divide the measured angle by 2 to get your miter-saw setting. For an 88° corner, cut each miter at 44°. For a 92° corner, cut at 46°.
-
Test-fit before committing. The joint should close tightly. If it doesn’t, adjust the saw angle by 0.5° increments until it does.
This technique works for minor out-of-square conditions (2–4° off). If the frame is worse than that, the trim will look visibly crooked even if the joints close — the reveal won’t be parallel to the frame edge. At that point, you’re better off fixing the frame itself.
Caulk-and-paint vs. accepting visible gaps:
For gaps under 1/16” at miter joints or along the wall: caulk and paint. Use paintable latex caulk, apply a thin bead, smooth it with a wet finger, let it dry, then paint. The gap vanishes.
For gaps 1/16”–1/8”: caulk still works, but you’ll see a slight caulk line under close inspection. Acceptable for most residential work unless you’re aiming for showroom quality.
For gaps over 1/8”: caulk starts to look like a patch job. At this point, decide whether to:
- Re-cut the trim with adjusted angles (time-consuming but gets a tight joint)
- Shim the frame to bring it closer to square (adds time but fixes the root cause)
- Accept the gap and paint the trim the same color as the wall (this minimizes visual contrast and makes small gaps less obvious)
When shimming isn’t worth it:
If the frame is so far out of square that you’d need shims thicker than 1/4” in multiple spots, or if the frame is actively racked (one corner pulled up and the opposite pulled down), shimming the trim won’t fix the visual problem — the doorway will still look crooked. In that case, the frame needs to be pulled back into square and re-fastened, or replaced entirely. That’s structural carpentry, not finish work. Call a carpenter to assess before you waste time on trim that will look wrong no matter how carefully you install it.
Step 7: Fill, sand, and finish
Use a flexible putty knife to press wood filler into all nail holes. Overfill slightly — the filler will shrink as it dries. For small gaps at the miter joints (less than 1/16”), wood filler works if you’re staining the trim. If you’re painting, paintable caulk is more forgiving and handles seasonal wood movement better.
Let the filler dry completely (check the product label — usually 30 minutes to 2 hours). Sand flush with 120-grit sandpaper, then smooth with 150-grit. Wipe the entire assembly with a tack cloth to remove dust.
Prime and paint, or stain and seal, per your finish choice. Sherwin-Williams wood trim finishing guidance recommends two coats of paint or polyurethane for durable trim in high-traffic areas like doorways. Let each coat dry fully before applying the next.
Verify it worked
Step back and look at the doorway from several angles — straight on, and from both sides at a low angle (this is where gaps show up). The miters should be tight, the reveal should be consistent all the way around, and the trim should sit flat against both the frame and the wall with no visible rocking or gaps.
Run your hand along the joints. You shouldn’t feel any proud edges or nail heads sticking up. If you do, sand or set those nails again before finishing.
Close and open the door a few times. The trim shouldn’t interfere with the door swing, and the door should still latch cleanly. If the door binds, check that you didn’t accidentally nail into the door stop or hinge side of the frame.
Troubleshooting
Problem: Gap at the miter joint after fastening
The trim shifted when you nailed it, or the frame isn’t perfectly square. If the gap is less than 1/16”, fill it with caulk (painted trim) or color-matched wood filler (stained trim). If it’s larger, remove the side casing, re-cut it with a fresh 45° angle (or an adjusted angle per the shimming section above), and re-fasten. For future joints, drive the first nail close to the miter before fastening the rest of the board — this locks the joint in place.
Problem: Trim won’t sit flat against the wall
See the “Dealing with out-of-square frames” section above for full shimming strategies. Quick version: for gaps under 1/8”, caulk the back edge where the trim meets the wall. For larger gaps, shim behind the trim, fasten through the shim, trim it flush, and fill.
Problem: Nail heads keep popping out months later
This is usually seasonal wood movement or nails that didn’t bite into solid framing. Pull the popped nail, pre-drill a new hole 1/2” away from the old one, and drive a fresh nail into the door frame (not just the trim). Use a nail set to sink it below the surface, fill, sand, and touch up the paint.
Problem: Stain looks blotchy on pine trim
Pine has irregular grain density and absorbs stain unevenly. Use a pre-stain wood conditioner (Minwax or similar) before applying stain — it evens out absorption and prevents blotching. If you’ve already stained and it’s blotchy, you’ll need to sand it back and start over with conditioner.
Problem: Miter saw cuts aren’t exactly 45°
Even a 1° error creates visible gaps. Test your saw: cut two scraps at 45°, flip one over, and press them together to form a 90° corner. If you see daylight, the saw needs calibration. Most miter saws have adjustment screws at the base that let you fine-tune the angle stops. Check the manual, or look for adjustment screws near the angle scale. Make small adjustments (0.5° at a time), then re-test with scrap cuts until the joint closes perfectly.
When to call a professional
Door trim installation is low-risk DIY work, but you’d benefit from hiring a finish carpenter if:
-
Your door frame is severely out of square (more than 1/2” difference in diagonals) and shimming strategies from the section above don’t bring it close enough. This indicates a structural issue — settling, improper installation, or water damage. A pro can assess the frame and recommend re-installing or sistering new jambs before you add trim.
-
You want museum-quality miter joints with zero gaps and don’t own a high-quality miter saw with a sharp blade and accurate stops. A finish carpenter has the tools and the eye to cut perfect miters consistently. Expect to pay $200–400 in labor for a standard interior door, depending on your market.
-
The opening has unusual geometry — arched top, angled walls, or a non-rectangular shape that requires scribing the trim to fit. That’s advanced carpentry and worth paying for if this is your first trim project.
-
You’re installing hardwood trim (oak, maple, walnut) in a high-visibility space and you’ve never done trim work before. Hardwood is expensive and less forgiving than pine — it splits more easily, shows every sanding scratch, and costs $5–12 per linear foot. A pro can install it in 2–3 hours; you might spend a full weekend and still end up with gaps or split boards.
For a standard rectangular doorway with basic tools and time to work carefully, this is a strong candidate for DIY. Take your time on the cuts, test-fit everything before fastening, and you’ll end up with a clean result.
FAQ
Can I install door trim without a miter saw?
Yes. Use a hand miter box (a guide that holds a handsaw at preset angles, including 45°) and a fine-tooth handsaw. It’s slower and requires more care to keep the saw vertical, but it works. Expect each cut to take 2–3 minutes instead of 10 seconds. A miter box and saw kit runs about $25–40 and handles occasional trim projects fine.
Do I need to remove the door to install trim?
No. The door can stay on its hinges. You’re fastening trim to the door frame and the wall, not to the door itself. Leaving the door in place actually helps — you can test the fit and make sure the trim doesn’t interfere with the door swing.
What’s the difference between door casing and door trim?
They’re the same thing. “Casing” is the formal carpentry term for the trim boards that frame a door or window opening. “Trim” is the general term people use for any decorative molding. When you install trim around a door frame, you’re installing door casing.
Can I install trim over existing trim?
Only if the old trim is thin and you’re installing thicker trim on top. Otherwise, remove the old trim first. Pry it off carefully with a flat pry bar, working from one end to avoid splitting the boards. If you’re in a rental or want to preserve the old trim for reuse, score the paint line with a utility knife before prying — it reduces tear-out.
How long before I can paint the trim after installation?
If you used wood filler, wait until it’s fully dry — check the label, but most fillers dry in 1–2 hours. If you used caulk, latex caulk can be painted in 30 minutes to 1 hour; silicone caulk needs 24 hours and isn’t paintable (use latex caulk for trim work). Sand any filler smooth and wipe dust before priming. You can paint immediately after priming once the primer is dry to the touch.
Which trim profile should I choose if I’m renovating multiple rooms?
Match the existing trim in adjacent rooms unless you’re doing a whole-house renovation. Mixing profiles looks unfinished. If you’re starting from scratch, colonial or traditional casing is the safe default — it works in most architectural styles and is easy to find at any lumber yard. Ranch cap or flat stock works well in modern or minimalist spaces. Avoid ornate profiles unless your home’s architecture specifically calls for them — a craftsman-style house can pull off substantial trim, but a 1990s ranch can’t.
Once the trim is installed and finished, the next common door complaint is squeaky hinges — an easy five-minute fix covered in How to Fix a Squeaky Door Hinge in 5 Minutes. If you’re doing a whole-house trim refresh, windows use the same miter-join technique and similar tools. And if you’re tracking the cost-benefit of DIY finish work versus hiring out, trim installation is one of the highest-return projects — you’re saving $200–400 in labor on a job that takes a few hours and requires only basic carpentry skills.