How to Hang a Large Mirror on Drywall Without Studs
A 36-inch mirror adds light and dimension to a room — until it crashes off the wall at 2 a.m. because you used anchors rated for picture frames. Installing a heavy mirror on drywall without hitting studs is absolutely doable, but it requires honest math about weight and the right anchors for the job.
This guide covers how to install a heavy mirror on drywall safely, starting with the weight calculation most tutorials skip and ending with a mirror that’ll stay put through door slams, vacuuming, and the occasional bumped furniture.
What you’ll need
Tools:
- Drill with bits (1/8” pilot bit, plus bit sized for your specific anchors)
- 24-inch level (18-inch works but makes alignment harder on large mirrors)
- Measuring tape
- Stud finder (even if you’re not mounting to studs — worth checking)
- Pencil
- Painter’s tape (for marking without wall damage)
Materials:
- Heavy-duty drywall anchors — see “Choosing the best mirror anchors” below
- Anchor screws (usually included with anchors)
- Your mirror with mounting hardware
Prerequisites:
- Wall in good condition (no cracks, soft spots, or water damage)
- Mirror weight confirmed from label or manufacturer specs
- Second person if mirror weighs over 100 lbs
Estimated costs:
- Heavy-duty toggle anchors: $10–15 for a 10-pack
- Ribbed plastic anchors (for mirrors under 80 lbs): $8 for a 50-pack
- Stud finder if you don’t own one: $15–40
Note: This article includes specific product examples. We may earn a small commission if you purchase through our links, at no additional cost to you.
Before you start
Check your mirror weight. The label on the back should list the weight; if there’s a frame, add 10–20% to that number. A 36”×48” framed mirror typically weighs 80–120 lbs. If you don’t have the label, measure and search the manufacturer specs online — guessing will get you anchors rated too low.
Inspect your wall. Tap the drywall with your knuckle where you plan to mount. It should sound solid, not hollow or echoey. Press gently — the wall shouldn’t flex. If you feel soft spots or see cracks, repair the drywall before hanging anything heavy. I learned this after a mirror pulled a chunk of water-damaged drywall off a bathroom wall in my last apartment.
Safety note for renters: Heavy-duty anchors leave larger holes than adhesive strips. Toggle anchors make 1/2” holes that require patching when you move out. Budget $10 and 20 minutes for spackle and touch-up paint, or factor that into your deposit expectations.
Clear the area below your mounting height. Move furniture, rugs, and anything breakable at least 3 feet away from the wall. Mirrors over 150 lbs should have two people present during installation.
Choosing the best mirror anchors
This is where most DIY mirror projects fail. Drywall alone doesn’t hold weight well — the anchors spread load across a larger area so it doesn’t rip through. Here’s what works:
For mirrors 50–100 lbs: Heavy-duty ribbed plastic anchors rated 50 lbs each. Use at least two anchors at the top corners. Plastic anchors are forgiving if you slightly over-drill the pilot hole and cost around $8 for a 50-pack.
For mirrors 100–150 lbs: Toggle bolts or butterfly anchors rated 65–100 lbs per anchor. Use a minimum of three anchors — two top corners and one center-bottom. Hinged toggle bolts are the standard here, rated 65 lbs each and reliable in standard 5/8” drywall, around $12 for a 10-pack.
For mirrors over 150 lbs: Either find studs and screw directly into them, or use specialty hinged toggle anchors rated 100+ lbs (roughly $15 for a 10-pack). Four anchors minimum for this weight class. Honestly, if you’re over 150 lbs and there are no studs where you need them, call a handyman — the stakes get higher and the margin for error gets smaller.
Spacing rule: Distribute anchors across the width of the mirror, not clustered in the center. For two-anchor mounting, place them 4–6” from the mirror’s top corners. For four-anchor mounting, add two lower anchors about two-thirds down from the top.
Step 1: Locate studs (even if you think there aren’t any)
Run your stud finder along the wall at the height you’re planning to mount. Studs are spaced 16 inches apart in most U.S. residential construction, so if you find one, measure 16” in either direction to find the next.
If your mirror’s mounting brackets align with studs, skip the anchor steps and screw directly into the studs with 2.5” wood screws. This is always the stronger option when available.
Mark any stud locations with painter’s tape. Even if they don’t align with your mirror, knowing where they are helps you avoid drilling into them accidentally when placing anchors.
Step 2: Mark your anchor points

Hold the mirror against the wall at your desired height (standard is with the center at 60–65” from the floor, though this varies with ceiling height and furniture). Use your level to make sure it’s straight, then mark mounting hole locations lightly with pencil.
If you’re working alone with a heavy mirror, use painter’s tape to mark the desired height on the wall first, then measure from the tape to where mounting holes should go based on the mirror’s hardware.
For four-anchor installations, mark the top two corners first (4–6” from the mirror edge), then mark the bottom two anchors about two-thirds down from the top and aligned vertically with the top anchors.
Step 3: Drill pilot holes
Check your anchor packaging for the recommended drill bit size — usually 1/8” to 3/16” depending on anchor type. Drilling too large weakens the hold; drilling too small can crack the anchor when you insert it.
Hold your drill perpendicular to the wall (not angled) and drill straight in about 1.5–2 inches. For toggle anchors, you’ll need to drill deeper so the wings can spread behind the drywall — check the package instructions.
Drill slowly and steadily. If you hit resistance after an inch, you’ve found a stud — mark it and either relocate your anchor point or switch to a wood screw for that mounting point.
Step 4: Insert anchors
For plastic ribbed anchors: Tap them gently with a hammer until they’re flush with the wall surface. Don’t pound hard — they should seat snugly, not be forced in.
For toggle or butterfly anchors: Follow the package directions exactly. Most require you to squeeze the wings together, insert through the hole, then pull back so the wings spread behind the drywall. You’ll feel resistance when they catch.
For hinged toggle anchors: These have a metal bar that flips open behind the wall. Push the anchor through until you feel the bar clear the back of the drywall, then pull back gently to set it.
The most common mistake is over-tightening during insertion, which twists the anchor and reduces its holding power. Hand-tight is usually correct.
Step 5: Mount the mirror

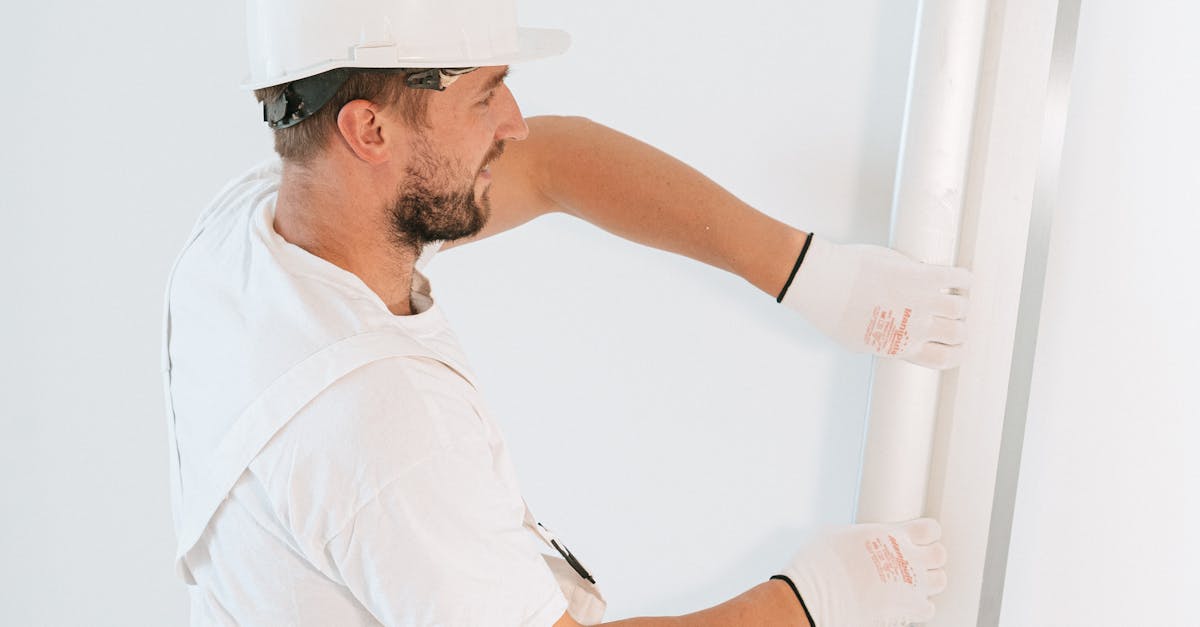
Have your helper hold the mirror level against the wall while you start the first screw. I always start with a top corner anchor, thread the screw through the mirror’s mounting hardware, and tighten it hand-tight — not fully tight yet.
Insert the remaining screws in alternating order: if you tightened top-left first, do bottom-right next (for four-anchor) or top-right (for two-anchor). This distributes pressure evenly and prevents the mirror from tilting as you tighten.
Once all screws are started, go back and tighten each one firmly but not forcefully. You should feel resistance increase, then stop. Over-tightening can pull anchors out of alignment or crack plastic anchors.
Step 6: Verify it worked
Step back and check the level in both horizontal and vertical orientations. Adjust now if needed — once the mirror’s been hanging a few hours, the anchors set and adjustments get harder.
Gently push the top of the mirror toward the wall, then release. It should return to position without shifting side-to-side. If it rocks or feels loose, check that all screws are seated properly in the mounting hardware.
Don’t hang anything else on the wall nearby for 24 hours — vibration from drilling or hammering can stress fresh anchor installations.
Troubleshooting common issues
Problem: Anchor spins in the hole when I try to tighten the screw
The pilot hole was drilled too large, or the drywall is damaged. Remove the anchor, move 2–3 inches to the side, and drill a new pilot hole. Patch the failed hole with spackle before it becomes a weak point.
Problem: Mirror tilts to one side after installation
One anchor is bearing more weight than the others, usually because the screws weren’t tightened evenly or the mirror’s mounting hardware isn’t level. Loosen all screws slightly, re-level the mirror, then re-tighten in alternating order.
Problem: I hit a stud where I don’t want one
Move the anchor point 2” to either side of the stud, or mount directly to the stud with a wood screw (this is actually stronger). Adjust the opposite anchor point to keep the mirror level.
Problem: The drywall cracked around the anchor after drilling
Stop immediately. This indicates the drywall is too thin, damaged, or brittle for this weight. You’ll need to either find studs, use a different mounting method, or call a professional to assess the wall.
When to call a professional
Don’t DIY this if:
- Your mirror weighs over 150 lbs and there are no studs available at the mounting points
- The wall shows cracks, soft spots, water stains, or flexes when you press it
- You can’t find studs and aren’t confident identifying solid drywall
- The mirror will hang over a bed, sofa, or other high-traffic seating area (liability and safety)
- Your wall is plaster or lath-and-plaster construction (different anchor requirements)
- You’re in an older building and unsure what’s behind the drywall
A handyman charges $75–150 for mirror installation depending on your area. That’s cheaper than a broken mirror, a damaged wall, or a security-deposit deduction.
FAQ
What’s the maximum weight you can hang on drywall without studs?
With the right heavy-duty toggle anchors, you can safely hang up to 150 lbs on standard 5/8” drywall using 3–4 anchors rated for 65–100 lbs each. Beyond that weight, you should mount directly to studs. Always include a 20% safety margin when calculating anchor capacity.
Can you hang a heavy mirror with adhesive strips?
Adhesive strips are rated for up to 16 lbs per pair of large strips, so theoretically you could hang a 32–48 lb mirror with multiple strip sets. In practice, I don’t recommend adhesive strips for mirrors over 30 lbs — the failure rate is too high and the consequences (broken mirror, damaged floor, potential injury) aren’t worth the convenience. Use proper anchors for anything substantial.
How do you know if your drywall is thick enough for heavy anchors?
Standard residential drywall is 5/8” on walls and 1/2” on ceilings. You can measure thickness at an outlet (turn off power first, remove the cover plate, and measure the drywall depth). If your drywall is 1/2” or shows any damage, use higher-rated anchors like hinged toggles rather than standard plastic anchors, or reduce the mirror weight you’re attempting.
Do you need to patch anchor holes when you move out?
Yes, if you’re renting. Toggle anchors and heavy-duty anchors create 1/4”–1/2” holes that are visible. Patching requires lightweight spackle (~$5), a putty knife, fine-grit sandpaper, and touch-up paint. Budget 20 minutes per hole. Small plastic anchor holes (under 1/4”) can often be filled with spackle alone without paint if your walls are white.
Once your mirror is up and level, the room will feel bigger and brighter — and you’ll know it’s actually secure.