
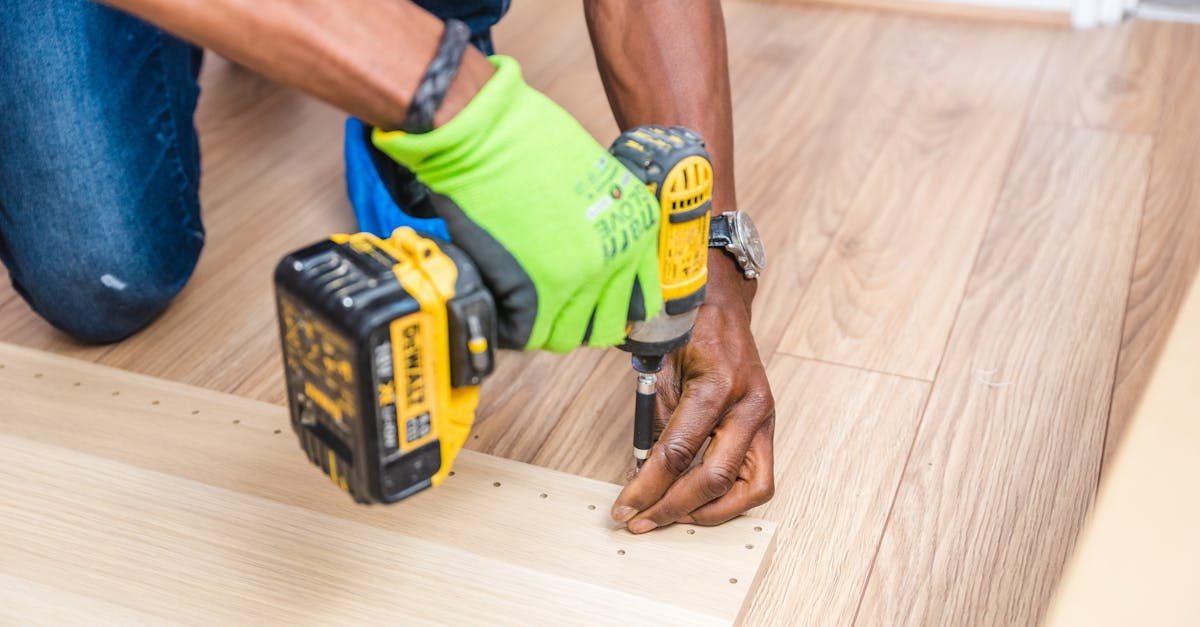
A squeaky floor isn’t announcing structural failure — it’s usually announcing that a nail worked itself loose or a joist settled a quarter inch. The fix is often $10 in screws and 30 minutes of listening carefully. Before you call someone and spend $400 on a service visit, you can diagnose the squeak yourself and decide whether it’s a tighten-it job or a call-the-pro situation.
Most squeaks come from loose fasteners between the hardwood and subfloor, or between the subfloor and joists. Wood expands and contracts with humidity, and over years those fasteners loosen. That’s normal — and fixable. This guide walks through four methods, from easiest to most involved, so you can match the fix to your floor’s actual problem.
What you’ll need
Tools:
- Power drill or screwdriver
- Hammer
- Nail set (for countersinking finish nails)
- Tape measure
- Headlamp or work light (if working from below)
- Car jack (2-ton minimum, only for Method 4)
- Level or straight edge (for checking joist alignment)
Materials:
- 2.5” deck screws or ring-shank flooring nails
- Powdered graphite lubricant (talc-free)
- Wooden shims (cedar or hardwood, if shimming joists)
- Wood filler (optional, for filling screw holes in visible hardwood)
Prerequisites:
- Ability to pinpoint the squeak location by walking and listening
- Access to basement or crawlspace (for Methods 2 and 4)
- Basic comfort with power tools
Before you start
Most squeaky floor fixes are low-risk, but confirm you’re not dealing with rot or structural damage before driving fasteners. If you see soft wood, discoloration, or standing water in a crawlspace, address the moisture problem first — the squeak is a symptom, not the disease.
Turn off the lights and walk the floor at night if the squeak is hard to locate. Sound travels differently in a quiet house, and you’ll pinpoint it faster. Mark the spot with painter’s tape or a pencil.
If you’re working from below, wear gloves and a headlamp. Crawlspaces are dark, splinter-prone, and full of spider webs. That’s fine — just dress for it.
Method 1: Tighten fasteners from above (easiest)
When this works: Squeaks in one or two isolated spots; hardwood floors; you don’t have crawlspace access.
Time: 30 minutes
Cost: $0–$10
Walk the floor until you locate the squeak. Have someone else walk while you listen, or record yourself on your phone and replay it to map the exact spot. Mark it with a pencil.
If you can access the space below (basement or crawlspace), check which direction the joists run. You’ll drive fasteners perpendicular to the joists to avoid splitting wood. If you can’t access below, assume standard 16-inch joist spacing and drive screws at an angle toward where you estimate the joist sits.
Drive a 2.5” deck screw (or ring-shank flooring nail) into the floor about 2 inches away from the squeak’s center. Angle it slightly so it catches both the hardwood and the subfloor beneath. Stop when the screw is snug — over-tightening splits the wood or snaps the fastener.
Add 2–3 more screws in a triangle pattern around the squeak, spacing them 6 inches apart. Walk the floor again and listen. The squeak should be gone or dramatically quieter.
For visible hardwood, countersink the screw head slightly and fill the hole with wood filler that matches your floor’s finish. Sand smooth once dry.
Image suggestion: Close-up of drill driving angled screw into hardwood floor, with marked squeak location visible in frame
Method 2: Screw from below (most reliable)

When this works: Persistent squeaks; you have basement or crawlspace access; squeaks run along a joist line.
Time: 1–2 hours
Cost: $20–$40
Go into the crawlspace or basement with a headlamp. Have someone walk the floor above while you listen and watch for movement. When you locate the problem area, mark the joist with chalk.
Drive 2.5” screws up through the subfloor into the hardwood above. Space them 8–12 inches apart along the joist. The screws pull the subfloor tight against the hardwood and eliminate the gap that’s causing the squeak.
Stop turning when the screw is snug. You’ll feel resistance increase as the screw pulls the two layers together — don’t over-drive it or you’ll snap the fastener or push the screw head through the hardwood upstairs.
If you see a visible gap between the subfloor and joist (more than 1/4 inch), that joist has settled and needs shimming — skip to Method 4 instead.
Walk the floor from above and confirm the squeak is gone. This method is the most reliable for centered squeaks because you’re fixing the actual gap, not just masking it.
Image suggestion: View from crawlspace showing drill driving screw upward into subfloor, with joist and marked squeak location visible
Method 3: Apply graphite lubricant (temporary relief)
When this works: Squeaks caused by board-to-board friction; quick fix while you plan a more permanent solution; no crawlspace access.
Time: 15 minutes
Cost: $10–$15
Warning: Use only talc-free powdered graphite. Do not use talcum powder — it’s a respiratory hazard and banned by the EPA for many applications.
Locate the squeak and identify the gaps between hardwood boards. Use a powder applicator bottle (available at hardware stores) or a turkey baster to puff graphite into the gaps.
Walk the floor. The graphite reduces friction between boards and quiets the squeak temporarily. Vacuum up any excess powder from the surface.
This fix lasts weeks to months, not years. The graphite works its way out over time as the boards move. Use this method when you need immediate relief but plan to tighten fasteners later.
Method 4: Shim loose joists (for structural movement)

When this works: The entire floor feels bouncy; squeaks occur over a large area; you see visible sag in joists from below.
Time: 2–4 hours
Cost: $10–$30
Warning: Lift joists very slowly — 1/8 inch at a time. Lifting too fast can crack plaster, drywall, or adjacent joists upstairs.
From the crawlspace, inspect joists with a level or straight edge. If you see a gap between the joist and subfloor (1/4 inch or more), that joist has settled and is causing movement when weight is applied.
Place a car jack under the problem joist with a block of wood on the jack head to distribute pressure. Lift slowly — one turn of the jack handle at a time — until the joist makes contact with the subfloor again.
Stop if you hear cracking above. Let the jack down slightly and reassess. The goal is to close the gap, not to lift the entire house.
Wedge wooden shims into the gap between the joist and its supporting beam or post. Drive them snugly with a hammer. The shims should hold the joist level when you remove the jack.
Lower the jack slowly. The shims should stay in place. Screw the shims to the joist with 2–3 screws to prevent them from creeping out over time.
Walk the floor above and confirm the squeak is gone. This method fixes movement-based squeaks across large areas — it’s the right fix when fasteners alone don’t work.
Image suggestion: Car jack lifting joist in crawlspace, with shims and level visible, showing proper support placement
Verify it worked
Walk the floor in different spots, including where you did the work and adjacent areas. Squeaks sometimes migrate a few inches after you tighten one spot — that’s because the floor shifts load to the next weak fastener.
If the squeak moved, repeat the method at the new location. If the squeak got quieter but didn’t disappear, you may need to combine methods — tighten from above and shim from below.
If the entire floor still feels bouncy after shimming, you’re looking at a structural issue that needs professional assessment.
Troubleshooting
Problem: Squeak came back after a few months
Fasteners worked loose again, usually because of continued wood movement. Re-tighten with slightly longer screws (3”) or add more fasteners around the original spot. Consider addressing humidity if you live in a high-moisture climate — wood movement accelerates with humidity swings.
Problem: I over-drove a screw and it pushed through the hardwood
Back the screw out slightly, fill the hole with wood filler, and sand smooth. Drive a new screw 2 inches away at a shallower angle. Use less torque this time — stop as soon as you feel resistance.
Problem: The floor feels spongy when I walk on it
This isn’t a squeak — it’s a structural concern. Check for joist damage, rot, or span issues. Don’t attempt DIY fixes beyond shimming. Get a structural engineer assessment before proceeding.
Problem: I discovered soft wood or discoloration in the crawlspace
Stop. That’s rot or moisture damage. Address the moisture source first (drainage, vapor barrier, foundation cracks) before fixing squeaks. The squeak is a symptom of a larger problem.
When to call a professional
Call a contractor or structural engineer if:
- You discover soft, spongy wood or visible rot in joists or subfloor (indicates moisture damage or decay)
- The entire floor sags or feels bouncy across multiple rooms (structural concern, not a fastener issue)
- Joists are cracked or split along their length (load-bearing failure)
- You’re uncomfortable working in a crawlspace due to claustrophobia, respiratory concerns, or standing water
- You live in a home built before 1980 and suspect asbestos in floor sealants or tiles — do not sand or disturb
A structural assessment costs $300–$600 and tells you whether you’re dealing with a cosmetic squeak or a load-bearing problem. If you spend 2 hours on DIY fixes and the squeak persists, get the assessment before doing more work. One overlooked structural issue compounds into expensive repairs later.
Full subfloor replacement (if rot is confirmed) runs $1,200–$3,000+ depending on the area. Joist repair or sistering (reinforcing a damaged joist with a new one alongside it) costs $600–$1,500+ per joist. If a pro quotes you north of $2,000, get a second opinion.
FAQ
Can I fix squeaky floors without removing the hardwood?
Yes — most squeaks are fixed by tightening fasteners from above or below, without removing flooring. You’ll drive screws through the existing hardwood into the subfloor (Method 1) or up from the crawlspace through the subfloor into the hardwood (Method 2). Only severe rot or structural damage requires removing flooring.
Why does my floor only squeak in winter?
Wood contracts in cold, dry air and expands in warm, humid air. In winter, boards shrink slightly and fasteners loosen. The squeak happens when weight shifts the boards against loose fasteners. Tightening fasteners (Method 1 or 2) usually fixes it permanently, regardless of season.
Will fixing squeaky floors damage my hardwood finish?
Minimal damage if you countersink screws and fill holes with matching wood filler. Use a drill bit slightly smaller than the screw shank to avoid splitting the wood, and stop tightening when snug. For high-gloss or stained floors, test the filler color in an inconspicuous spot first.
How do I know if the squeak is the subfloor or the hardwood?
Walk the floor and listen to the pitch. A high-pitched creak usually means board-to-board friction (hardwood). A deeper groan means subfloor movement against joists. If you have crawlspace access, have someone walk above while you watch from below — you’ll see exactly where the movement happens.
Is a squeaky floor a sign of foundation problems?
Not usually. Most squeaks are loose fasteners or seasonal wood movement — both are cosmetic, not structural. If the squeak comes with visible cracks in walls, doors that won’t close, or sloping floors, get a foundation inspection. Otherwise, it’s a fastener job.
Most squeaky floors quiet down with $20 in screws and an hour of methodical work. Start with the easiest method (tightening from above) and escalate only if the squeak persists. If you discover moisture, rot, or structural sag during the process, that’s the time to call a pro — the squeak just led you to something that needed attention anyway.