

I’ve installed and removed shower enclosures in three different rental properties, and the hardest lesson wasn’t about product quality — it was realizing that the $400 sliding glass kit I loved took six hours to remove and cost me $150 in deposit deductions because I rushed the caulk removal on move-out day. The best enclosure for renters isn’t the one that looks best installed; it’s the one you can reverse cleanly when your lease ends.
Quick verdict:
- Curved acrylic corner panels are best for renters staying 2+ years who want a permanent look with low removal risk
- Tension rods with premium fabric curtains are best for month-to-month leases or strict no-modification rules
- Magnetic splash guards are best for studio/loft showers with partial enclosure needs
- Sliding glass kits are best for renters with landlord approval who plan to stay 3+ years
- Corner acrylic frames are best for renters balancing cost and appearance without landlord permission
At a glance
| Option | Price (as of 2026-08-08) | Damage risk on removal | Install time | Removal time | Best for |
|---|---|---|---|---|---|
| Curved acrylic panel | $180–$400 | Very low (adhesive-only) | 1–2 hours | 2–3 hours | 2+ year stays; modern look |
| Tension rod + curtain | $50–$150 | None | 15 minutes | 5 minutes | Month-to-month; zero risk needed |
| Magnetic splash guards | $100–$250 | None | 30 minutes | 10 minutes | Partial enclosure; odd layouts |
| Sliding glass kit | $600–$1200 | Low–Moderate (caulk) | 3–5 hours | 4–6 hours | 3+ years; landlord approval |
| Corner acrylic frame | $300–$800 | Low–Moderate (caulk) | 2–4 hours | 3–5 hours | 1–3 years; no landlord permission |
Getting landlord approval: when to ask and how to negotiate
Most leases include vague language about “alterations” or “modifications,” and landlords interpret that wildly differently. I’ve had one landlord approve a full glass enclosure install over email, and another threaten deposit forfeiture over command strips. The key is understanding what landlords actually care about: liability, water damage, and whether they’ll need to repair anything after you move.
When to ask for approval:
- You’re planning a caulked installation (sliding glass or corner frame)
- Your lease explicitly prohibits “fixtures” or “permanent alterations”
- You’re staying 2+ years and want to negotiate leaving the enclosure as an improvement
- The bathroom has existing damage you want documented before you install anything
When you can skip approval:
- Adhesive-only curved panels with no caulk
- Tension rods (zero modification)
- Magnetic guards (no adhesive at all)
- Your lease explicitly permits “non-permanent improvements”
What landlords care about:
- Water damage prevention (good ventilation, proper waterproofing) — the International Code Council sets residential bathroom standards that prioritize moisture control, and landlords who’ve dealt with mold remediation costs know this
- Reversibility without specialized labor (they don’t want to hire someone to fix your DIY work)
- Documentation that you’ll restore the space to original condition
- Liability: you won’t flood the unit below or create a slip hazard
Template request email:
Subject: Request to install removable shower enclosure
Hi [Landlord],
I’d like to install a [curved acrylic panel / corner frame enclosure] in the bathroom to reduce water splash and improve the space. The installation uses [adhesive only / caulk at edges] with no drilling or permanent changes to tile or walls. I’ll document the original bathroom condition with photos and will remove and restore everything to original condition when I move out.
The enclosure improves moisture control (reduces mold risk) and I’m happy to leave it installed as an upgrade if you prefer. Let me know if you’d like product details or photos of similar installations.
Thanks, [Your name]
Landlords respond better when you frame it as damage prevention rather than cosmetic preference. If they approve, keep that email — it’s your documentation if there’s a deposit dispute later.
Curved acrylic corner panel — best for renters staying 2+ years
These are single curved panels (brands like Vigo and DreamLine make them) that attach with clear silicone adhesive at the edges and sometimes a floor track. No drilling, no frame — just a transparent barrier that makes your shower look intentional. I installed one in a bathroom I was prepping for a long-term tenant and it held up through two lease cycles with zero maintenance.
The adhesive bond is strong enough for daily use but removes cleanly if you use a caulk softener like DuPont Caulk Remover and a plastic scraper. Budget 2–3 hours for removal; most of that is waiting for the softener to work. Silicone adhesives cure based on humidity and temperature — installers following Schluter waterproofing guidelines know that full cure takes 24–48 hours in dry climates, and removal is easiest if you soften it at room temperature (60–75°F) rather than trying to heat-gun it off, which can leave melted residue.
Strengths:
- Looks permanent and modern — significantly upgrades bathroom feel
- No drilling means no patching required
- Works with most standard tub/shower sizes (measure first)
Weaknesses:
- Removal takes patience; rushing it can leave adhesive residue
- Not adjustable once installed — you get one shot at placement
- Some panels fog/scratch over time (acrylic, not glass)
Best for: Renters who plan to stay 2+ years, want a real bathroom upgrade, and are willing to spend a Saturday afternoon removing it carefully when they move.
Tension rod + premium fabric curtain — best for month-to-month leases
This is the zero-risk option. A heavy-duty tension rod (not the $12 one that falls down weekly) plus a premium fabric curtain and waterproof liner gives you a temporary shower partition that takes fifteen minutes to install and five minutes to remove. I’ve used the Moen curved tension rod with a linen-blend curtain in three rentals and it’s never caused damage.
The trade-off is aesthetic — even with high-end fabric, it still reads as “shower curtain” instead of “enclosure.” If your lease forbids modifications or you’re on a month-to-month, this is the only truly reversible option.
Strengths:
- Absolutely zero deposit risk
- Easiest install and removal by far
- Cheap enough to replace if you want a style change
Weaknesses:
- Still looks like a curtain (psychological downgrade vs. glass/acrylic)
- Fabric options get mildewy without good ventilation — run your exhaust fan
- Liner needs replacement every 6–12 months
Best for: Renters with strict lease terms, month-to-month tenants, or anyone who wants a bathroom update without any installation learning curve.
ASHRAE Standard 62.2 sets minimum ventilation rates for residential bathrooms at 50 CFM intermittent or 20 CFM continuous — if your bathroom doesn’t have a working exhaust fan, address that before upgrading any shower setup. The EPA recommends good ventilation in enclosed shower spaces to prevent mold growth.
Magnetic splash guards — best for partial enclosures
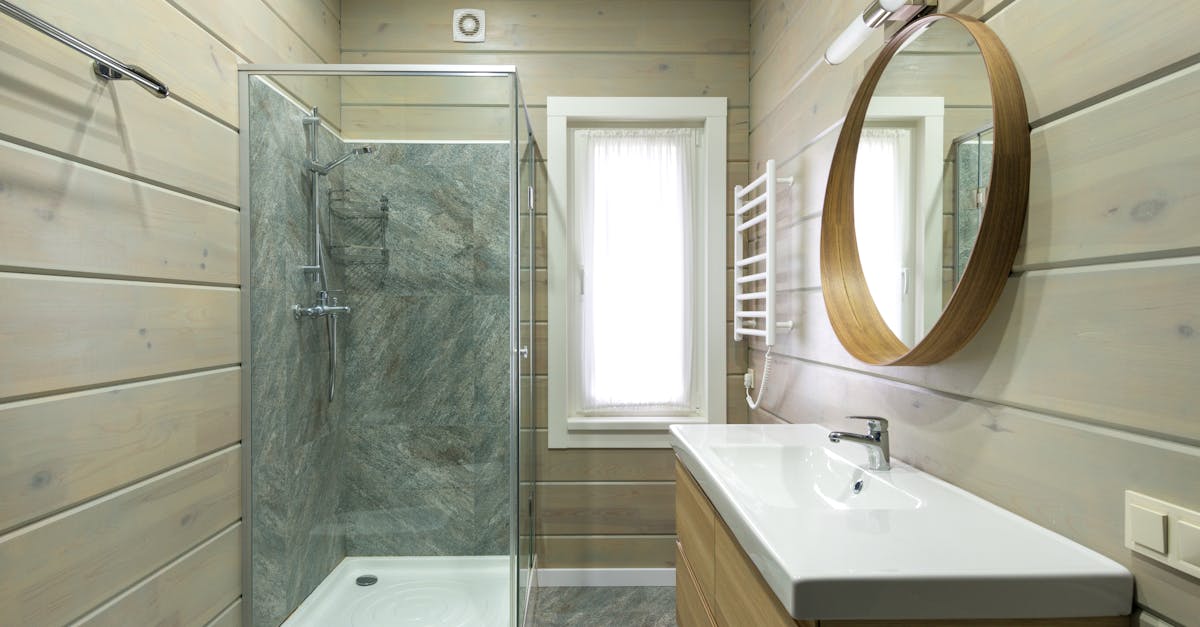
These are acrylic panels with magnetic strips that attach to existing tile (assuming your tile has metal studs behind it — test with a fridge magnet first). They’re designed for partial enclosures: one side of a clawfoot tub, a walk-in shower that needs a splash barrier, or odd layouts where a full enclosure doesn’t fit.
I haven’t personally installed one, but a contractor friend used them in a loft conversion with an open shower and said removal was trivial — peel off the magnetic strips, wipe down the tile, done.
Strengths:
- Truly zero-damage removal (no adhesive at all)
- Works for non-standard layouts
- Repositionable if you get the placement wrong
Weaknesses:
- Only works if your tile has ferrous backing (many don’t)
- Not a full enclosure — water can escape at edges
- Limited style options compared to glass kits
Best for: Renters with clawfoot tubs, walk-in showers, or studio layouts where a full enclosure isn’t needed and you want zero installation commitment.
Sliding glass kit with minimal frame — best for 3+ year stays with landlord approval
These are the semi-permanent option — brands like Aston and Vigo sell sliding-door kits with thin aluminum framing that get caulked to the tub deck and walls. They look like what you’d find in a new apartment build, and if you’re staying long-term they’re worth the install effort.
The catch: caulk removal on move-out. Even with a softener, you’re looking at 4–6 hours to remove the enclosure, scrape off all the silicone, and clean the tile without chipping edges. I did this once and the tile survived fine, but it’s tedious work and there’s real risk if you rush it.
Strengths:
- Looks genuinely high-end — biggest aesthetic upgrade on this list
- Glass is easier to clean than acrylic and won’t fog over time
- Adds resale appeal if your landlord lets you leave it installed
Weaknesses:
- Longest install and removal time
- Caulk removal mistakes can chip tile edges (small repair cost: $50–$150 for touch-up grout/caulk)
- Many leases require landlord approval for this level of modification
Best for: Renters staying 3+ years who have landlord permission and want a bathroom that feels like they own it. Not worth it for 1-year leases.
Corner acrylic frame enclosure — best for balancing cost and appearance

These sit between curved panels and sliding glass kits — they have a visible frame (usually white or chrome) with acrylic panels and a hinged door. Install is 2–4 hours with basic tools, and removal is 3–5 hours if you’re careful with caulk. Brands like Delta and Sterling make versions that fit most standard 60” tubs.
I installed one of these in a rental three years ago and the tenant is still using it. The frame hides minor install imperfections better than frameless options, which matters if you’re learning as you go.
Strengths:
- Looks permanent enough to feel like an upgrade
- Frame forgives small measurement/alignment mistakes
- Middle-ground pricing — not cheap, not premium
Weaknesses:
- Caulk removal on move-out is still required (plan 3–5 hours)
- Frame style can look dated depending on finish
- Heavier than curved panels; awkward to maneuver solo during install
Best for: Renters staying 1–3 years who want a real enclosure upgrade without needing landlord approval or spending sliding-glass money.
Lease language to review before installing
Most security deposit disputes over shower enclosures come down to how your lease defines “fixture” versus “improvement” versus “damage.” I learned this the hard way when a landlord tried to keep $300 of my deposit for “unauthorized fixture installation” — the enclosure I’d installed and fully removed, leaving zero damage. I won that dispute because my lease didn’t define what “fixture” meant, but it took three weeks and small claims paperwork.
Key lease terms to look for:
“Fixtures” vs. “temporary improvements” — Some leases define anything attached with adhesive or caulk as a fixture requiring written approval. Others permit “non-permanent alterations” that are fully reversible. If your lease uses the word “fixture” without defining it, you have negotiating room — adhesive-mounted panels aren’t legally fixtures in most jurisdictions because they’re not connected to plumbing or wiring.
“Normal wear and tear” exclusions — Landlord-friendly leases sometimes say “any alteration, addition, or change not present at move-in constitutes damage beyond normal wear.” That language makes even reversible improvements a deposit risk. If you see this, get written approval before installing anything, or stick with tension rods.
“Restore to original condition” requirements — This is standard language, but watch for versions that say “professional restoration required” — that’s code for “we’ll charge you for a contractor even if you could do it yourself.” Document the original bathroom condition with timestamped photos (email them to yourself for the metadata) so you can prove you restored it properly.
State-specific “reasonable modification” laws — Some states give renters explicit rights to make reversible improvements without landlord approval. Others require written consent for anything beyond picture hooks. Check your state tenant rights before assuming your lease terms are enforceable.
Red flag language: “Tenant is liable for all costs associated with removal or repair of any installed item” — this puts you on the hook even if removal causes zero damage. Negotiate this out or don’t install anything caulked.
Before installing, send your landlord a brief email describing what you’re doing. Even if your lease doesn’t require approval, that email creates a paper trail showing you acted transparently — landlords have a harder time claiming “unauthorized damage” when you told them in advance and they didn’t object.
Protecting your deposit: adhesive removal that actually works
The single biggest deposit deduction risk isn’t the enclosure itself — it’s the adhesive residue you leave behind when you remove it carelessly. Landlords photograph residue patterns and call them “damage requiring professional cleaning,” which translates to $100–$200 in deductions. I’ve removed four different enclosures and learned that silicone adhesive removal is more about patience and chemistry than scraping force.
Why silicone is hard to remove: Silicone cures through a moisture-activated chemical reaction that cross-links the polymer chains. The longer it’s been cured, the stronger the bond — and older silicone doesn’t soften as easily as fresh silicone. Humidity and temperature during the original installation affect cure depth; a bead applied in summer at 80% humidity cures differently than one applied in winter at 30% humidity. That’s why some adhesive strips peel off cleanly and others leave thick residue.
Removal process that protects tile:
- Apply caulk softener (DuPont, 3M, or DAP brand) along all adhesive seams and let it sit for 2–3 hours minimum. Don’t rush this — the solvent needs time to penetrate.
- Keep the room at 65–75°F during removal. Cold adhesive is brittle and chips; warm adhesive smears.
- Use a plastic putty knife, never metal. Metal scrapers chip tile edges and grout lines — I’ve seen $200 repair bills from one slip.
- Peel adhesive in long, slow pulls rather than scraping in short strokes. If it’s not coming off easily, apply more softener and wait.
- Clean residue with denatured alcohol on a microfiber cloth. Avoid acetone on tile — it can discolor grout.
Common mistakes that cost deposits:
- Trying to remove adhesive the day before move-out (no time buffer if something goes wrong)
- Using a heat gun to “speed up” removal (melts adhesive into tile pores, impossible to clean)
- Scraping dry adhesive without softener first
- Not documenting the original bathroom condition before installing (landlord claims your “damage” was already there)
Documentation that wins deposit disputes: Take timestamped photos of the bathroom before you install anything. After removal, take photos showing clean tile, grout lines, and edges. Email them to yourself so the metadata is preserved. If your landlord claims damage, you have proof you restored the space properly.
One landlord tried to charge me $150 for “tile repair” after I removed a corner frame enclosure. My before/after photos showed the tile edge chip was present before I moved in. The deposit dispute took two emails to resolve because I had documentation.
Common mistakes renters make
Underestimating removal time. Caulked enclosures need 3–6 hours to remove properly. If you wait until move-out day and rush it, you’ll chip tile or leave adhesive everywhere — that’s how deposits get withheld.
Choosing based on photos alone. Acrylic and glass look identical online but feel very different in person. Acrylic scratches and fogs; glass stays clearer but costs more. If possible, see the product at a showroom before ordering.
Installing over old caulk. New adhesive won’t bond to old silicone. If your tub already has caulk around the edges, remove it first or your enclosure will leak within a month.
Ignoring tub dimensions. Most enclosures assume a 60” wide tub. Older buildings often have 54–58” tubs. Measure three times before ordering — returns on opened enclosures are a hassle.
Not testing tile backing before buying magnetic guards. Stick a fridge magnet on your tile before ordering. If it doesn’t stick, magnetic guards won’t work — your tile backing isn’t ferrous metal.
Skipping ventilation checks. Enclosed showers trap humidity. If your bathroom doesn’t have a working exhaust fan, you’ll develop mold within months. That’s both a health issue and a deposit issue.
FAQ
Can I install a shower enclosure without damaging my rental?
Yes, if you use adhesive-only or magnetic options and take your time during removal. Caulked enclosures are low-risk if you use caulk softener and plastic scrapers, but plan 3–6 hours for removal. Tension rods have zero damage risk.
Will my landlord let me install a shower enclosure?
It depends on your lease. “Non-permanent modifications” usually cover adhesive-mounted enclosures; caulked installations are a gray area. If your lease is vague, send your landlord a quick email describing what you’re installing — creates a paper trail that protects you later.
How do I remove caulk without chipping tile?
Use a caulk softener (DuPont or 3M brand), wait 2–3 hours, then scrape with a plastic putty knife. Never use a metal scraper on tile — it will chip edges. Keep the room at 65–75°F during removal; cold adhesive is brittle and warm adhesive smears. Budget twice as much time as you think you need.
Do I need landlord permission for adhesive-mounted panels?
Check your lease language. If it prohibits “fixtures” without defining the term, adhesive panels fall into a gray area — they’re not plumbed or wired, so they’re not fixtures under most building codes. If your lease explicitly permits “non-permanent alterations” or “reversible improvements,” you’re covered. When in doubt, send a brief email to your landlord describing what you’re installing — even if approval isn’t required, the paper trail protects you.
What if my landlord claims damage after I’ve removed everything cleanly?
Document the original condition with timestamped photos before installing, and document the restored condition after removal. Email the photos to yourself so the metadata is preserved. If your landlord makes a deposit deduction claim, those photos are your evidence in a dispute. Most small claims courts favor tenants who can prove they restored the space properly.
Affiliate disclosure: This article contains affiliate links. If you purchase a product through one of these links, we may earn a small commission at no additional cost to you.
For most renters, a curved acrylic panel or corner frame enclosure hits the sweet spot — real upgrade feel, manageable install, low deposit risk if you’re patient on move-out. If your lease is strict or you’re staying less than a year, stick with a premium tension rod setup and save the enclosure upgrade for when you own.